Wednesday, August 21, 2013

Chay-Ara Hol Hawkgirl Cosplay Update 2 (Mace Tutorial)

Well...Chay-Ara is proving much more difficult that I originally thought. The way I decided to do the wings....I don't even want to get started on explaining it right now, but I promise I will, and I will refer you to an easier wing tutorial!
Here's what I've done so far:
WINGS


 MACE TUTORIAL
Styrofoam ball, meet dowel, dowel, meet styrofoam ball.

Take a piece of card stock, roll it into a cone and glue it together with hot glue.

Probably a better visual for that step. Fill the cone tip with hot glue to make it sturdy, let it dry.

Glue those B******* in place.


VERY IMPORTANT: Cover the styrofoam in plaster putty/drywall repair paste. Otherwise when you try to paint it, your styrofoam will melt.

Paint that sucker, and add detail with dry brush!
Chay-Ara's top, yes I know..."it's different than the cartoon AND the comics" Well...I'm claiming artists privilege here. I love Ancient Egypt, and I wanted to look like a mummy! Yes...I know it's a crude dummy/helmet stand...but hey..I work with what I have.
My Stargate gauntlet...errr...Chay-Ara Hol gauntlet is coming along very nicely. I had to find the proper sized gems!


Scarab detail. It may be "Stargate" but it fits quite nicely into my Egyptian Chay-Ara Hol, quite nicely indeed.
PS! Don't forget about the Central Coast Comic Con, I will be BLACK CANARY on Saturday the 7th!!!! I will be a surprise on Sunday (That just means I haven't decided between HYDRA, Spoiler, and Zatanna)

As far as Chay-Ara Hol goes, I ran out of white shirts to rip up and soak in tea to make the skirt so I must get back to it soon!

Saturday, August 3, 2013

Stargate Gauntlet/craft foam armor/Chay-Ara Hol cosplay update

Aside from Green Arrow, I've been yearning to be Chay-Ara Hol (basically the ancient Egyptian version of Hawkgirl) and have been trying to get a hold of the Endless Flight run by Geoff Johns. Anyways...I was watching Stargate, because I lurve that movie...and saw the gauntlet fitted with talons, and thought that'd be a lovely addition to the Egyptian version of Chay-Ara. Hawkman gets a talon gauntlet...I get one too. A Stargate one. I saw a really awesome video on making jewelry for cosplay out of craft foam and that was it....I HAD to do it. This is just increasing my love for craft foam. Hang on...this is going to be a wild tutorial:
Reference pictures are so wonderful!

I first started by tracing my hand on a piece of paper to map out my design, and also have an accurate measurement of all the sections so I wouldn't have to keep stopping. I don't have a picture of just that, so ignor the semi-finished pieces in the following picture:


You see that chain metal fingerless glove type thing underneath the pretty part? I'm just going to make a crocheted version in that multi-grey silver yarn. poof. Ok. Moving on....I broke this down into 5 talons, 6 gems, 5 rings, and 4 pieces to the gauntlet. This tutorial is going to focus on the gauntlet, and the talons because those are all made out of craft foam. That's right 1-2 sheets of craft foam will run you around $1.50.
Onto the magic!
Make individual finger templates that are the length of your second finger joint to however long you want the talon. I noticed the one in the photo had the contour/half circle cut outs so I cut them out, traced them onto foam and cut that out as well.

Use a hair drier to heat them up individually, wrap the lower portion around your finger, and fold the talon portion in half, pulling and curving it down. It took me several hair drier hits to the talon part to get it to curve the way it did in the above picture.

Next I cut out the hand and wrist portions of the gauntlet, and started to lightly sketch out the raised edge outline that you see on those pieces in Stargate.

Here is a cool tip about craft foam: Press in with your pencil, but don't tear, to create what looks like embossed jewelry, the pattern on his gauntlet was a bunch of arcs. If you are unsure of how you want them layed out, lightly sketch it on and then press down when you have it marked.

To create a raised edge around it, you have two options. I chose puff fabric paint, which does come at the price of an overnight drying time. You can also hot glue on thin strips of craft foam, and seal the edges / corners with glue, and it will look welded. After that is all dry, hit it with the hair drier, and bend it to your arm.
Here is where you need to coat it in glue or mod podge. I like at the very minimum 2 coats. Once the final glue/mod podge coat dries, use acrylic paint in whatever color you choose.
And this is 2 coats of gold acrylic paint. After I find the gems, I will dry brush them with some green/black to give them that ancient look.
The next part is going to take a little bit of doing since I don't want to learn how to use resin at the present to make my own gems, and since I don't really feel like making a chain mail glove, as mentioned above I am going to crochet myself a finger-less glove in a silvery/metal-look yarn. I will post pictures when I assemble it!
I really hope Chay-Ara is finished in time for the C4, I know it will be done in time for Comikaze!!!! So...I hope to see you all there :D
Nerd Rendezvous

Tuesday, July 30, 2013

Gotham/Batgirl Inspired Bathroom Ongoing Project

Hey everyone....I know, where have I been? It's called life and too many times it gets in the way of what I really want to be doing. The other day I was in my bathroom cleaning and realized my shower curtain looks like a Gotham City skyline, and I got happy. Then I looked around at all the mis-matched pieces, peeling wallpaper, and Legend clock. Don't get me wrong, I love my Legend clock where two unicorns are silhouetted against a sunset,  "They express only love and laughter, dark thoughts are not known to them." But...it's red and orange. I'm going for purple and black with the accents of yellow! I had the idea to have novelty soaps i.e. these great ones from Luxury Lane Doap (Nerd section!) (who I love because they have a Young Frankenstein  Abby Normal soap, a Decepticon soap, Marvel soaps....need I go on?!?!), but you could go to any etsy seller, or artfire store such as these: Mel's Fun Suds, or the talented Tub Time, or Sky Rain Soap, among millions of other soap shops.
I also want to make my own curtains, and above bath fabric piece...thing to have bat signals and/or other comic details. It's not going to be completely in your face or lame/childish, but enough to please me.
I'm sorry for the small tiddly update...but seriously I am busy as a beaver, and also considering an Etsy or Artfire store myself.
I promise to do a Chay-Ara Hol cosplay tutorial soon, so stay tuned ya'll! Also, vsit me on facebook! I'm there much more frequently than here! Nerd Rendezvous
LATER!
PS Get your tickets for C4 and Comikaze now...they're going fast!

Tuesday, July 16, 2013

New 52 Green Arrow Cosplay / Chay-Ara Hol Hawkgirl Weekend Success

After a very exhausting weekend, I have pictures for ya'll. Also, you can find me on instagram @ nerdrendezvous and on facebook: Nerd Rendezvous because I tend to post a zillion progress pictures over on those, including my Chay-Ara Hol Hawkgirl wing build which is a very SLOW process that is testing my patience. It's totally worth it because they look amazing so far. I hope they are done by C4 in September or Comikaze in November, I'll be able to go as multiple characters! Weeeeeeee!
Now for the meat and potatoes....my previous post was how to build armor using foam, and build away I did. 2 legs and 2 arms are now complete and are a nice glossy green!


BOOM! That just happened. I attached them by gluing velcro straps on, and sizing them to GA's arms/legs.
We made a pattern for the hooded vest base, cut it out of the green canvas material, sewed it all together, and as of right now it just needs the embellishments added on.
The quiver (I will absolutely make a quick tutorial right after this) and some arrows are now done.
This photo via @ chambernaut's Instagram feed:
the quiver in the first few issue of New 52 is more of a back pack type...thing so here is a view of that:


Now onto MY favorite part: Chay-Ara Hol: WINGS!!!!!!!!
As you can see this is a very slow (one feather at a time) process. After they are all glued on there, I will shape them, and texture them, paint them, and then attach a harness of some sort...I haven't thought that part out yet, and I'd be ecstatic if one of you guys had some ideas, or have done this before and could give me some advice!!!!! <3


Tuesday, July 9, 2013

New 52 Green Arrow Cosplay Armor Build

Hey everyone...I know I've been rather silent lately (unless you're on the facebook page Nerd Rendezvous, I do try and keep up correspondence over on that front AND more photos) I've been dealing with the troubles of adulthood. Enough with the blah! Let's see some of the progress on Ollie!
My first foray into foam armor has been full of trial and error, messy floor, trips to Harbor Freight, and lots of burning myself with various heat tools. It's been worth it! I finally finished (yes...finished) one arm guard, and here is what it looks like:
Hey! It's GA himself @chambernaut.
For this type of armor I used two types of foam: EVA (Exercise Mat) and craft foam sheets. The heat gun makes bending and forming the EVA foam sooooo easy, so I suggest investing in one (Harbor Freight $15, just sayin') you will find that you use it A LOT. Also...just a little tid bit of info...do NOT use it on the thin craft foam sheets, it's way too powerful and will torch it. You can use a hair drier for those.
I cut out a simple arm guard pattern on the EVA that was the length from GA's knuckles to a little past the elbow, and wide enough to bend down  an inch or two on either side of his arm. You then bend the sides, by using the heat gun to heat it up, and bend it along a straight line at whatever angle you want. You can actually stop there, coat it in glue or mod podge, and air brush the segmented look onto it. I mean....it's that crazy and simple. But I wanted the 3d effect, so I took pieces of craft foam and cut them into the segments, and glued them on in a layered fashion to the EVA foam base. I coated the whole exterior in glue/mod podge twice. I primed it, then spray painted it. Here is my super huge advice when it comes to these projects: Use acrylic paint and a brush, not spray paint. Better yet, mix a little mod podge into that acrylic paint. I know...you're thinking, "But spray paint cuts down painting time...and I don't have to do as many coats." Yeah you're right. But it also will crack if you accidentally lay something against it, or it needs to bend. I had nice awesome arm guards, until one of them was leaned on and now my options are, BATTLE SCARS, or START OVER. My Talons however (there will be a post on them shortly) were coated in gold acrylic paint with brush and mod podge, and have no problems. We decided that it looked really awesome when it looked like the comic book art, with all the outlines surrounding the glossy green, so we sharpied it up around the edged of each green segment.
Solid glossy piece pre-crackles. It looks much better with the black lines all over it.


EVA foam (grey) has been bent using heat gun. Lay out your craft foam segments near by in order to make it a smoother process.

Oh nothing.......Just a couple trick arrows
 Sorry guys, but that's about all I've summed up right now, but don't worry. This weekend is dedicated (from 5pm Saturday through whenever we finish Sunday) to Green Arrow's props getting done. That means arm guards, leg guards, quiver, arrows, hopefully the vest/hood, sleeves, belt/buckle and beer canisters. It looks like I won't be sleeping in order to get this done. Not to mention the other hundred million projects I'm working on :/ Stay tuned!

Don't forget to get your tickets to C4 and Comikaze before they sell out guys....and then look both me and @chambernaut up when there! You know what to look for, I'll either be Black Canary, Madame Hydra, Chay-Ara Hol, or Tala...I've even got a Kate Beckett cosplay in the works. I will definitely be forming a schedule for those looks, and more tutorials to come!

Saturday, June 22, 2013

Chay-Ara Hol (Hawkgirl) Cosplay Build Part 1

Hey everyone! I know you're all (or the lucky ones at least) are getting ready for Comic Con, or various other conventions, and I wanted to share my exciting news.
I didn't feel like the list of ongoing projects was quite long enough, so I decided to go ahead with making a cosplay I have wanted to do for quite some time. Not to mention it will make for VERY good tutorials (combined with the New 52 Green Arrow Cosplay build posts)  for anyone trying to build armor using craft foam & EVA foam (exercise mat foam sheets).
This post serves as post 1 of however-many-posts-it-takes-to-complete-this-costume, and will show how I made Chay-Ara's belt and started her collar. For those of you who are unfamiliar with Hawkgirl, go...frolic in the land of Thanagar. I am particularly enthralled in the ancient Egyptian version of her so I went for a part comic, part Justice League Unlimited animated series costume idea. Here is a picture of the JLU version:
Chay-Ara Hol DC
Why have I never acted upon this urge to don ancient Egyptian garb and golden wings? I was intimidated. I just started cosplaying earlier this year, to think of constructing wings? *Scoff* Helmet? *Scoff* But you know what? I'm going to do it. I've got brains and can pick up crafts relatively easily.
So far I'm proud of the pattern making skills I seem to pick up, however, I'm going to have to learn to have a little more patience. I guess I will also admit (albeit grudgingly) I can't magically learn to do new crafts without trial and error.

Ok...so there is this crazy stuff known as craft foam. When you heat it up it can be molded into whatever you need which is super useful in the land of cosplay. I have done a tutorial on how to make it into a  Form Fitting Mask using the over/hair dryer as a heat source. The collar tutorial will build onto that foundation. For right now I will just show you my progress, and how I got there.

The belt was made from craft foam, hot glue, mod podge, (or elmers glue) paint and velcro.
I used the "Ancient History" episode of JLU as length reference for the belt. I sketched out the pattern onto some newsprint so I didn't end up wasting craft foam again *sigh*. It was a good thing because I ended up playing around with the angles of the lines about three times before deciding on the end result. This is what it looked like:

I colored in the original messy one for fun


I traced them onto sheets of scrap foam, color doesn't matter as you'll be painting over it, and cut them out.
Keep in mind there are 2 pieces. There is a large green piece underneath which gives the belt a little movement and play.
 I then cut out a strap long enough to go around my waist plus extra for velcro closure, glued the strap on using hot glue t ONE side of the center piece, painted all of them with two-three coats of mod podge (you can use Elmer's glue!) and then painted them gold with the turquoise accent piece. Let them dry!!!!!!!!!! Add a piece of velcro to the open side of the belt to be able to open/close it.


Boom! Egyptian belt for any costume, and added bonus!!! Chay-Ara Hol.
The collar is a little more difficult. I started by measuring my neck (circumference) to get the center circle of the collar (diameter). I then measured from mid neck to place on chest where I wanted the collar to fall, and then doubled it to get the overall diameter of the collar. I also used newsprint to sketch out a pattern. I then drew out two inner circles for guides for the accent pieces.


To save myself from disaster, after cutting out the pattern, I cut the whole thing in half, and drew 2 halves onto a sheet of black craft foam. I deconstructed it a bit further, by cutting out the 1st inner circle (closest to the neck) out of one half, and then broke down the outer circle into 1/4's, drew those on yellow craft foam (I wanted a raised border) and cut it all out, and glued it all together (except 1 side, really really important to leave one line open to be able to get it on/off) with hot glue. 


You can use velcro to attach,  which I will be doing towards the end of the collar. After you get everything you want to be on the collar, but before painting or mod podging, you'll want to shape it to your neck/shoulders. I highly recommend getting help for this step. Please don't be like me and have a huge burn on your neck because you tried to do it yourself. The photo can be seen on our Facebook page: Collar Burn Your arms just DON'T bend that way...unless you are a contortionist. And before we get any further, the burn is not from the foam. The burn is in fact from the genius idea to heat the collar while on my neck since I was doing this project alone.Yeah...I know...genius. So you'd heat it up either in the oven or with a hair dryer until it's flimsy, and then have someone squish it down on your shoulders, neck, chest until it's cool and molded to you. You may end up heating it up several times. I am going to put some aloe on this burn and hopefully retry this tomorrow with the use of a handy dandy assistant. I am trying really hard not to just rush right into the wings and helmet here....I have some more research to do in both those areas. :)

Wednesday, June 12, 2013

Crocheted Octopus Hair Bauble

Are you a mermaid? Do you often look at the ocean or go to aquariums in hope of seeing an eight-legged wonder? Do you wonder how you could adorn yourself with such a lovely creature?
If you answered yes to any of those questions...or just really like octopi keep reading!
As you may know I have gotten into crochet projects. Don't worry, I'm not switching from nerd projects to just a really very simple crochet blog. I did however want to include this particular project on the blog, as there have been several inquiries as to where I obtained such a fashion accessory.
 What exactly is "it"? Well, as the explanation is rather long, I will just provide you a picture.
You may think...OH MY GOD, THERE IS AN OCTOPUS FUSED TO HER HEAD! I assure you this is the case. His name is Count de Bubbles. I wanted a unique fascinator to go with one of my steampunk corsets, and had recently finished a truly awesome project ( I can't share it here until after someone receives it as their birthday gift) and thought, hey, there must be a way I can make a stuffed octopus using the same principles I had just learned to make aforementioned secret awesome birthday gift. Thanks to a quick foray on google...I learned there was....it's called Amigurumi. and boy is it a clever way to make a awesome gift (and cheap). The only problem is you have to be good at crochet. Which I am not...so it involved cussing out the wazoo, mistakes, and several attempts to make a pattern for you guys, as the only octopi I could find were round (and we all know octopi are not round balls.) So.....get ready for my first crochet pattern:

Body
Round 1: 6 sc in a magic ring (6)
Round 2: 2 sc in each stitch (12)
Round 3: 1 sc in first stitch, 2 sc in 2nd stitch, repeat around to beginning (18)
Round 4: 1 sc in first 2 stitches, 2 sc in 3rd stitch, repeat around to beginning (24)
Round 5: 1 sc in first 3 stitches, 2 sc in 4th stitch, repeat around to beginning (30)
Round 6: 1 sc in first 4 stitches, 2 sc in 5th stitch, repeat around to beginning (36)
Rounds 7-12: sc in every stitch (36)
Round 11: 1 sc in first 4 stitches, decrease in 5th stitch, repeat around to beginning (30)
Round 12: 1 sc in first 3 stitches, decrease in 4th stitch, repeat around to beginning (24)
Round 13: 1 sc in first 2 stitches, decrease in 3rd stitch, repeat around to beginning (18)
Round 14: Sc in first 9 stitches, chain 1 and turn your work
Round 15: Sc 29 stitches (yes you will be going over the 9 stitches you just made), chain 1 turn your work
Round 16  (FINAL STEP!!!!): Sc 9 stitches, slip stitch/tie off (WOOOO!!!!)
Stuff it with cotton, or old pillow fill. Do NOT sew the end together, you will see why later.

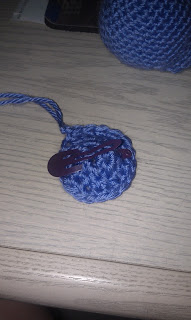
NOTE: this is for a little bit smaller octopus than seen in the above picture....I had delusions of grandeur..but for a better hold and better size-to-head ratio I shrunk it down a little.
Un-stuffed

Stuff it then shape it, I like the side that will lay against my head to be semi flat like a lounging octopus.


Tentacles (Each chain makes 2 so make 4)
Chain 40
In the second chain from hook, 3 sc's.
3 sc's in every stitch back to the end of chain.
Tie off, fold in half.


Alternate Tentacle: bi-colored method (Each chain makes 2 so make 4)
Use 2 colors of yarn at one time side by side. Chain 31
In second chain from hook, 2 sc's in every stitch back to the end of chain. Tie off. Fold in half.

Hair Attachment Piece
Round 1: 6 1/2 dc's into magic ring (6)
Round 2: 2 1/2 dc's in each stitch (12)
Round 3: 1/2 dc's into every other stitch (18)
Round 4: sc all the way around. Tie off.

The side facing the picture is the side you will clip to your head. Glue the tentacles to the opposite side.


One of the tentacles folded in half

Octopi ASSEMBLE!
You have a stuffed octopus body, tentacles, and an attachment piece. tuck in all the loose pieces of yarn. Now you need a hot glue gun. I'm sure if you really wanted to sew it together...you could...but after hours of crocheting...you just want the dang thing to be assembled and done, thus, hot glue gun. I laid out the tentacles how I wanted them to look on top of the attachment piece and lightly glued them (you don't need gobs of hot glue, just enough to hold it in place) down. next i made sure the body was stuffed into the shape of an octopus...not a round ball, and glued it on top of the tentacles/attachment piece.
Slide your hair comb or clip through the bottom, and voila! If you want it even more secure, bobby pin it around the bottom, and each tentacle how you'd like it to lay.
You can decorate it...put on eyes using buttons or cogs, give him or her a monocle, wings...a smilie face...anything to make it more you!

The completed Green one and almost finished lavender one:


Of course...if you've been reading the facebook page: Nerd Rendezvous you have seen a few mini updates through the last two weeks. I hope to finish a few projects this weekend to have something new for you guys soon. Fingers crossed the Titus (Nova Vol. 5) eye goes smoothly. Also...I am hoping to take pictures in all of my character outfits soon!
I'm seeing Man of Steel tomorrow, and am super excited. Maybe I will start getting organized this weekend and draw up some outlines for here so I can post more consistently! Also...Get your tickets for C4 and Comikaze now...they will sell out just as fast as Wonder Con!