I have been waiting and waiting and waiting for my nails to grow for the nail tutorial...but when you are into crafts this much it is almost impossible. I gave up and went to Target to get myself some fake ones. This is a hard tutorial. You will need patience and nail colors galore. For some designs, you may even need art skills, but not all of them require artistic talent. I realize I don't have a design for everyone's favorite characters, but maybe you can get inspired and create your own, or share it with me and I will try to create one for you.
 I am in no way ambidextrous...so I was never able to do my right hand with complicated designs, if this is you as well...do what I do...fake nails. Fake nails are so much easier to do than your own, for one...you don't have to wait for each layer to dry before using your hands, potentially chipping or smudging them. The problem with fake nails is being able to hold them while painting. I solved it for you!


 I am in no way ambidextrous...so I was never able to do my right hand with complicated designs, if this is you as well...do what I do...fake nails. Fake nails are so much easier to do than your own, for one...you don't have to wait for each layer to dry before using your hands, potentially chipping or smudging them. The problem with fake nails is being able to hold them while painting. I solved it for you!
What you will need:
Nail polish/paint pens
Scotch tape
Nail file
Nail polish remover
For fake nail designs you will also need:
Fake nails
Nail glue
Toothpicks
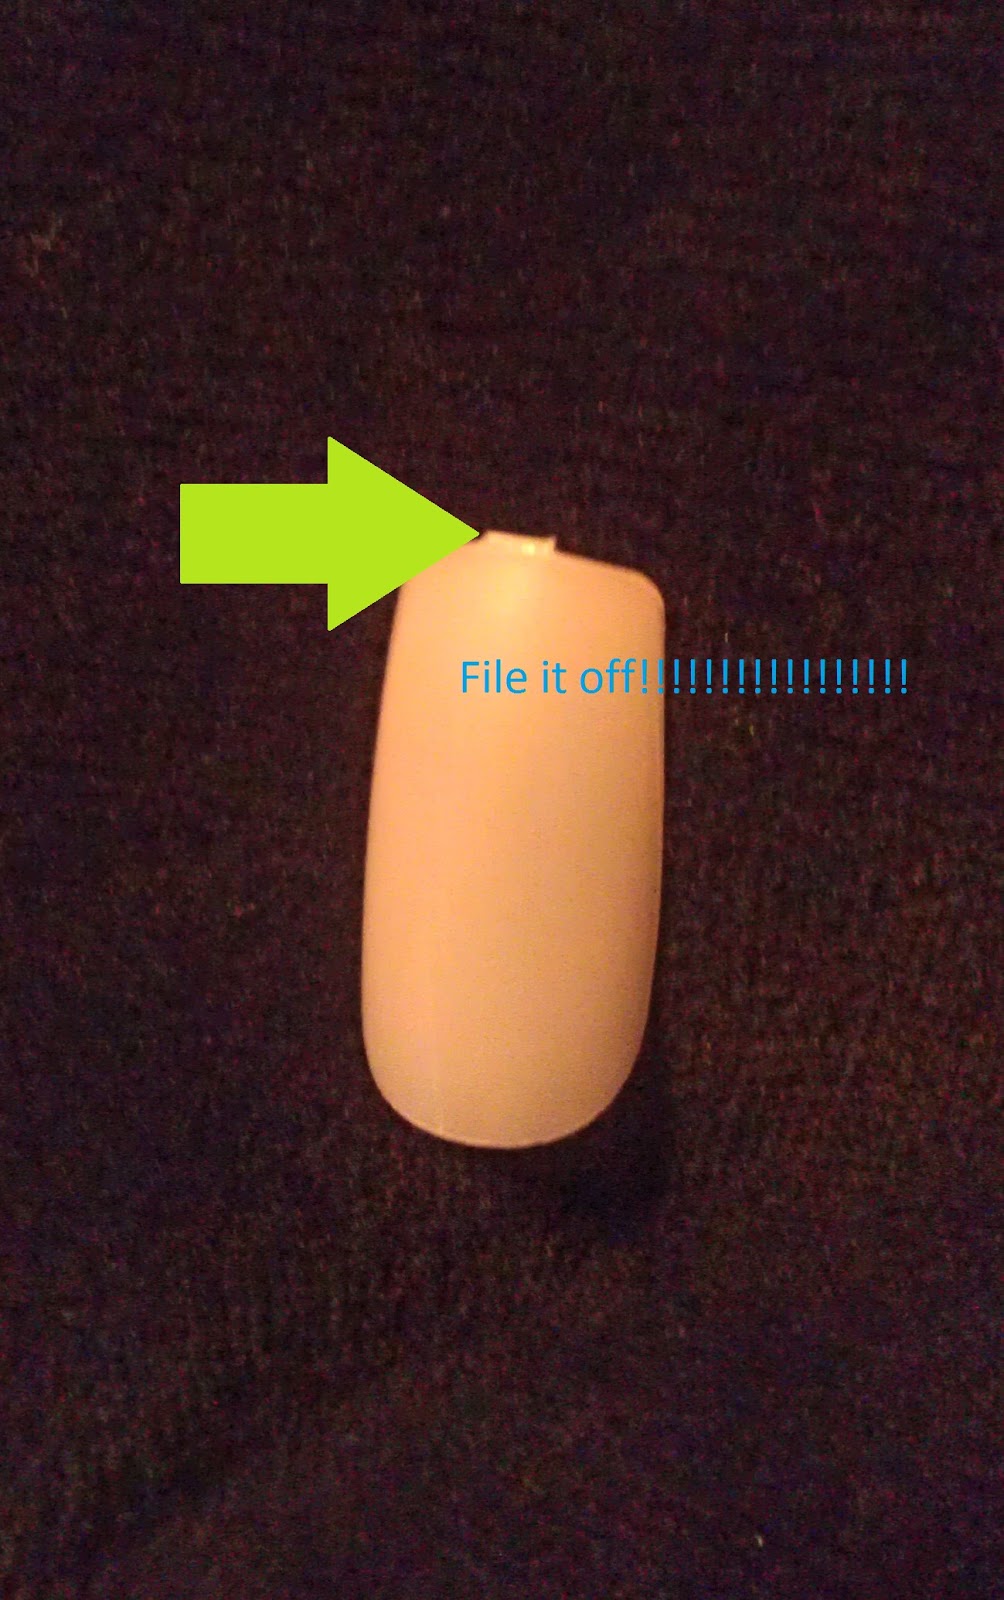
First step if you are using fake nails, pick the right sizes. If you use a nail that is too big it will rip off easily. Likewise if you use a smaller size than your nail, it will pop off. Next file off the little nub on the tip, you want to do this now so you don't have a chipped edge later...we do not want tacky edges!
Now to find a way to hold it, yet paint the entire nail...toothpick and tape. Roll a piece of tape so it is sticky on all sides, tape that to the end of a toothpick like so:

 |
| Make sure the nail won't come off while painting! |
(Begin here if you're doing this on real nails!!!!!!!!!)
You're ready to put down a base coat of color on your nails. Let the base coat dry, you may need a second coat, if so, let that coat completely dry. I let the base coats dry over night to make sure they're not going to smudge on me.

The characters I am doing are Iron Man, Harley Quinn, Batgirl, Captain America, T'Challa & a vibranium nail, Hawkeye, Wolverine, Gambit's charged card, and Batman. I have designs for a LOT of characters, so it's really hard to choose which ones I want to do, once I find one that works I will sketch it out. If you'd like some ideas, feel free to take a gander at these babies:


Next you start designing. each layer of design needs to dry before the next so...more patience.
For Captain America's shield, start with a white base and a red tip, then cut a piece of tape into a shape like this: -^- as if it were half of a star and lay it over the bottom portion of the nail to mask the white you will be keeping. Also, you need to cut an arched piece to cover the tip for the red you will be keeping.Press these firmly to the nail surface so no polish gets underneath. It will look like this:

Now take some blue and cover in between the tape to create the blue shield portion. You may need two coats. When the polish gets tacky, peel the tape off fast for clean lines. Allow the designs to dry and apply a top coat. BAM!

Here are some designs from earlier this year:


These are sure to wow everyone who sees them. If you'd like a specific nail how-to let me know via the comments section...these are all really simple nails, and you can make them even simpler just by using a color scheme. Hulk could be neon green nails with purple shatter polish over them. Bat nails can be black nails with yellow tips. Also, I will be randomly selecting someone to choose a character and receive a set of themed nails from the comments below, if you're interested, simply comment below by January 31st with your favorite characters! Bye for now guys!
No comments:
Post a Comment